DIY fibreglass pool kits Geelong

Leisurescape Pools & Spas premium DIY fibreglass pools are designed for a seamless owner builder installation experience. Whether you have a qualified trade background or no construction experience at all, our proven installation system, expert guidance, and comprehensive support provide everything you need to confidently create a professionally finished pool in your own backyard.

From planning through to completion, our DIY fibreglass pool solution delivers a smart, cost-effective way to bring your backyard vision to life while enjoying the ultimate escape from the Victorian summer heat. View our DIY fibreglass pool price list to compare available pool sizes and pricing.


DIY pool range

Our range includes 34 multiple contemporary shapes and sizes, allowing you to choose a design that complements your backyard layout and personal style. Whether you prefer compact, space-saving designs or larger entertainer-style pools, there are options to suit every property. View pool range.

All Leisurescape Pools are built to exceed Australian Standards using premium materials. We use undiluted resin and fibreglass with no bulking agents, ensuring maximum structural strength and long-term durability. Each pool is manufactured using precision-engineered moulds for a high-quality finish and consistent performance.

DIY pool colours

At Leisurescape Pools & Spas, we understand that pool colour is essential in creating the perfect outdoor atmosphere. Our carefully selected range of finishes allows you to customise your pool to suit your style, from relaxing and timeless to modern and dramatic.

Popular options include:

  • Classic Blue – A timeless choice offering a fresh, clear-water appearance with a calm, inviting feel.
  • Turquoise – A vibrant blue-green finish that creates a bright, resort-style look.
  • White / Pearl – A sophisticated finish that delivers a crisp, reflective water effect with added sparkle.
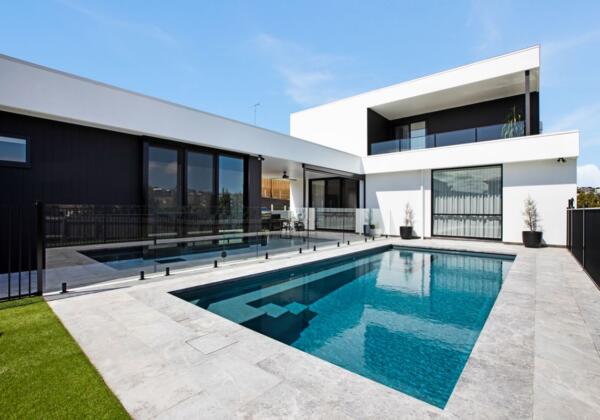
  • Black / Grey – A contemporary option ranging from soft greys to deep charcoal tones for a sleek, architectural finish.

Pool colour can be influenced by lighting, landscaping, and surrounding materials. Our team can help you select the perfect finish to complement your design and create your ideal outdoor space. View pool colours.

DIY pool prices

Our DIY fibreglass pool kits are available in a wide range of shapes and sizes to suit different backyards, lifestyles and budgets. Pricing varies depending on the pool model and dimensions you choose, with options ranging from compact designs through to larger family and entertainer-style pools.

Download our DIY pool price list to view current pricing across the full range and compare the options available.

What’s included in your DIY pool kit

  • Fibreglass pool shell with 25 year structural warranty and engineers compliance certificate
  • Pool shell delivered to site
  • Oasis Aquatics true variable speed 8 star energy efficient pump
  • Oasis Aquatics glass media or cartridge filter to suit pool size
  • Oasis Aquatics cx premium salt and mineral chlorinator
  • Filter glass media – amount varies depending on pool size
  • Salt – amount varies depending on pool size
  • Earth Minerals magnesium salt – amount varies depending on pool size
  • Skimmer box
  • LED pool light complete with transformer and remote: 4-6m pools: 1 light; 7 & 8m pools: 2 lights; 9-12m pools: 3 lights; 13-14m pools: 4 lights
  • Start-up tool kit including: vacuum hose; deluxe telescopic handle; resuscitation chart; deluxe vacuum head; deluxe leaf skimmer; deluxe broom; 4-in-1 pool water test kit

The step-by-step DIY installation process

Installing your own fibreglass pool involves several important stages, from choosing the right pool size and preparing your site through to permits, excavation, delivery, plumbing, backfilling, filtration and final compliance.

Our step-by-step DIY pool installation process (below) explains what to expect at each stage, helping you plan ahead and approach your project with confidence.

Choosing a pool size

Is a DIY Pool right for you?

Selecting the right fibreglass pool is one of the most important decisions in your DIY pool project. The ideal pool size will depend on your available space, property access, council requirements, intended use, and budget. Taking the time to plan these factors before purchasing your pool will help ensure a smooth installation and the best possible outcome.

Check excavation equipment access

Before selecting your pool, assess the access to your backyard. For a straightforward fibreglass pool installation, an access width of 2.5–3 metres down the side of your home is ideal. However, 900mm is generally the minimum width required for excavation equipment.

If access is narrower than 3 metres, smaller excavation equipment may be required, which can increase installation time and costs. In properties with very limited access, a crane may also be needed to lift the pool shell over the home and into position.

Our team can help assess your site and recommend the most practical installation method before you commit to a pool size.

Mark out your pool area

One of the easiest ways to visualise your new pool is to mark out its dimensions using builder’s string line, marking paint, or timber pegs. This allows you to see exactly how the pool will sit within your backyard and gives you a better understanding of the available space for entertaining, landscaping, fencing, and access pathways.

When planning your layout, consider:

  • Outdoor entertaining areas.
  • Pool fencing requirements.
  • Existing gardens and trees.
  • Access around the pool for maintenance.
  • Space for filtration equipment.
  • Future decking, paving, or landscaping.

Seeing the pool marked out at full size often helps homeowners confidently choose the most suitable model.

Locate underground services

Before any excavation begins, identify all underground services on your property. Visit Before You Dig Australia (BYDA) at www.byda.com.au to obtain free plans showing the location of underground sewer, water, gas, electrical, and telecommunications services.

If your property uses a septic system rather than mains sewer, you’ll also need to identify the location of your septic tank and associated pipework. Locating these services early helps avoid costly delays, redesigns, or damage during excavation.

Speak with council or a building surveyor

Every property has different building requirements that can affect where your pool can be installed. Setback requirements from your home, boundary fences, easements, retaining walls, and underground services may influence both the size and location of your pool.

Before finalising your design, it’s advisable to speak with your local council or a registered building surveyor to understand the applicable requirements. This can help avoid unnecessary delays during the permit approval process.

If you’re unsure where to start, Leisurescape Pools & Spas is here to help. Our experienced team can guide you through the planning process, explain permit requirements, recommend suitable pool sizes for your block, and help identify any potential issues before construction begins. With the right advice from the outset, you can move forward with confidence knowing your DIY pool project is set up for success.

Building permits and approval

Building permits and approval

Before construction of your DIY fibreglass pool can begin, you’ll need to obtain the necessary approvals and permits. As the Owner-Builder, you are responsible for securing all required permits and ensuring your project complies with Victorian building regulations and local council requirements. Owner-Builder Application via the BPC.

Leisurescape Pools & Spas will provide the required documentation and guidance throughout the process to help make your permit application as straightforward as possible.

Building permit

A Building Permit is required before any swimming pool construction can commence. As the property owner, you must obtain the permit and any additional approvals required from your local council or relevant regulatory authorities.

As part of your DIY pool package, Leisurescape provides the engineering drawings, installation documentation, and Australian Standards compliance information required to support your permit application. Because you are completing the project as an Owner-Builder, the Building Permit must be lodged in your name.

Before applying for your permit, you will need to:

  • Obtain a valid White Card (Construction Induction Card).
  • Complete the required Owner-Builder application through the Victorian Building And Plumbing Commission  (BPC)  where applicable.
  • Arrange a soil report for your property.
  • Prepare your site plan and supporting documentation.
  • Lodge your Building Permit application with your chosen Building Surveyor or local council.

Soil report requirements

A soil report (geotechnical report) is required as part of the pool permit process. The report identifies the soil classification and ground conditions on your property, including factors such as soil movement, drainage, and stability.

The soil classification helps determine the appropriate installation requirements for your fibreglass pool, including excavation, backfilling, and any additional engineering considerations that may be required for your site.

A soil report should be completed before finalising your installation plans, as different soil conditions can impact construction requirements and costs.

Planning permit requirements

Before commencing your pool installation, we recommend confirming whether a planning permit is required for your property. Planning permit requirements vary depending on your land zoning, overlays, easements and local council requirements. Where applicable, a planning permit must be obtained before construction can commence. A building permit for the pool and safety barrier is a separate requirement.

Asset Protection Permit

Some councils require an Asset Protection Permit before building works commence. This permit protects council-owned infrastructure such as footpaths, kerbs, nature strips, roads, and driveways during construction.

If required by your council, the permit must be obtained before excavation or deliveries begin. Your local council can confirm whether an Asset Protection Permit applies to your property.

Temporary pool fencing

Victorian regulations require a temporary compliant safety barrier to be installed during pool construction. The temporary fence must remain in place throughout the build and can only be removed once your permanent pool barrier has been installed, inspected, and certified as compliant.

A temporary barrier is required before the pool contains more than 300mm of water and must meet the relevant pool safety requirements.

Site plan requirements

A site plan forms part of your Building Permit application and shows the proposed location of your pool and safety barrier in relation to:

  • Your home.
  • Property boundaries.
  • Existing buildings and structures.
  • Easements.
  • Underground services.
  • Sewer lines.
  • Pool equipment location.

Leisurescape Pools & Spas can assist with arranging a professionally prepared site plan for approximately $550, or you can choose to engage your own draftsperson or building designer.

Permit approval

Once all required documentation has been prepared, your Building Permit application can be submitted to either your local council or a registered Private Building Surveyor.

Approval timeframes vary depending on the authority processing your application:

  • Local Council: Approval can take up to 12 weeks.
  • Private Building Surveyor: Approval is often faster, with some applications processed within 4–6 weeks, depending on complexity and workload.

We’re here to help

While the Building Permit must be obtained by you as the Owner-Builder, Leisurescape Pools & Spas will support you throughout the process. We can provide the required engineering documentation, assist with site plan requirements, recommend experienced Building Surveyors, and help ensure you have everything needed for a smooth and successful pool installation.

Pool delivery

Pool kit delivery across Geelong and Victoria

Leisurescape Pools & Spas will arrange delivery (price included) of your DIY fibreglass pool kit directly to your front kerb. Depending on the size of the pool and site access, the excavator can often lift and place the pool shell directly into the hole. Where access is more restricted, a crane may be required to lift the pool over your home and into position. Please note that crane hire is an additional cost.

If your site presents access challenges or you need assistance sourcing a suitable crane provider, our experienced team can recommend trusted operators and help you plan the safest and most efficient installation.

Installation requirements

How DIY fibreglass pool installations work

Installing a DIY fibreglass pool involves several key stages, from plumbing and backfilling through to the concrete bond beam, filtration, fencing and final compliance. Following each step carefully helps ensure your pool is installed safely, correctly and in line with the required standards.

Plumbing and connections requirements

Plumbing and connections requirements

The skimmer box, return jets (eyeballs), and any optional features such as spa jets, water features, deck jets, or pool heating will need to be connected using high-quality Class 9 PVC pressure pipe and two-part PVC pressure cement designed for underground pool plumbing.

As a general guide:

  • 50mm Class 9 PVC pipe is used from the skimmer box to the filtration pump to maximise water flow.
  • 40mm Class 9 PVC pipe is typically used for return jets and most other pressure lines.
  • Additional plumbing may be required for optional equipment, including heat pumps, chlorinators, water features, or in-floor cleaning systems.

Before backfilling around the pool shell, all plumbing should be pressure tested to confirm there are no leaks or faulty joints. This is a critical step, as it is far easier to rectify any issues before the plumbing is covered.

To protect your pool from groundwater pressure, a 100mm PVC standpipe must also be installed and connected to the hydrostatic relief valve located in the floor of the pool. This allows groundwater levels beneath the pool to be monitored and, if required, safely relieved, helping to prevent hydrostatic pressure from lifting or damaging the pool shell.

Our DIY pool kit includes detailed installation instructions, and our team is available to provide guidance throughout the plumbing and installation process.

Backfill and levelling requirements

Backfill and levelling requirements

Once the pool shell has been positioned, levelled, and the plumbing has been pressure tested, the next stage is backfilling, this is one of the most critical steps of the installation process, as it provides long-term support for the pool shell and helps prevent future movement.

The area around the pool should be backfilled using cement-stabilised crusher dust in accordance with Australian Standard AS 1838:2021. This material provides excellent structural support while resisting erosion from groundwater, helping to maintain the stability of the pool over time.

Backfilling should be completed gradually in layers, with the material evenly placed and compacted around the entire perimeter of the pool. At the same time, the pool should be filled with water at a similar rate to the backfilling process. Maintaining equal water and backfill levels is essential to balance the pressure on the pool shell, keeping it level and ensuring the pool walls remain straight and true.

During this stage, regularly check:

  • The pool remains level in all directions.
  • Pool walls stay straight with no visible distortion.
  • Plumbing remains secure and undamaged.
  • The backfill is evenly distributed with no voids or gaps.

Once the water depth exceeds 300mm, temporary compliant pool fencing must be installed to meet safety regulations and prevent unauthorised access during construction.

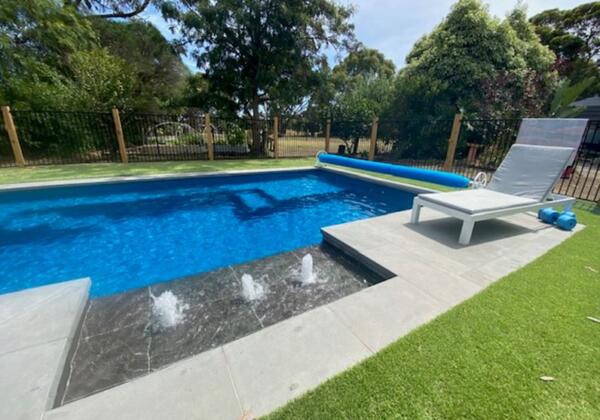
Plumbing on the left-hand side of the pool supplies the filtration equipment, including the pump, filter, chlorinator, and the water feature, before these services are concealed beneath the finished landscaping.

By taking the time to complete the backfilling process correctly, you’ll provide a solid, stable foundation that will help ensure your fibreglass pool performs reliably for many years to come.

Concrete bond beam requirements

Concrete bond beam requirements

Once the pool has been backfilled and the shell is stable, the next stage is constructing the reinforced concrete bond beam around the perimeter of the pool. The bond beam is a critical structural element that locks the pool shell into place, supports the coping, and provides a solid foundation for the surrounding paving and landscaping.

The bond beam should extend around the entire pool and be constructed in accordance with Australian Standard AS 1838:2021. It must be reinforced with steel reinforcing bar (rebar) and/or reinforcing mesh to provide the strength required to resist ground movement and the loads imposed by the surrounding hardscape.

The reinforcement is mechanically tied to the underside of the pool coping, allowing the concrete to key beneath the coping edge as it is poured. Once cured, the reinforced concrete forms a strong structural connection between the pool shell and the surrounding bond beam, helping to prevent separation or movement over time.

The pool coping is typically 400mm wide, creating a robust platform for the installation of coping tiles, natural stone, pavers, or other edge finishes. A properly constructed bond beam also helps distribute loads from paving, pool fencing, and landscaping evenly around the pool, reducing the risk of cracking or settlement.

Before pouring the concrete, ensure:

  • The pool shell is level and correctly positioned.
  • Backfilling has been completed and compacted as specified.
  • All plumbing has been pressure tested.
  • Reinforcement has been correctly positioned and securely tied.
  • Formwork is level and set to the required finished height.

Taking the time to construct the bond beam correctly will ensure your DIY fibreglass pool has a strong, durable foundation, providing long-term structural integrity and a professional finish ready for coping and paving installation.

Filtration installation requirements

Filtration installation requirements

With the pool shell installed, backfilled, and the bond beam complete, the final stage of your DIY fibreglass pool installation is to install and commission the pool equipment. This includes connecting the filtration system and ensuring all equipment is operating safely and efficiently before the pool is handed over for use.

The equipment setup typically includes:

  • Filtration pump
  • Pool filter (cartridge, media or glass media filter)
  • Chlorinator or sanitising system
  • Pool controller or timer (if applicable)
  • Heat pump (if applicable)
  • Water feature or spa pumps (if included)

Once all plumbing and electrical connections have been completed by the appropriate licensed trades where required, the equipment should be tested to ensure everything is functioning correctly. This includes:

  • Priming the filtration pump and checking for leaks.
  • Verifying correct water flow through the filtration system.
  • Testing the chlorinator or sanitising system.
  • Checking the operation of heaters, water features, and other optional equipment.
  • Ensuring all valves are operating correctly and water is circulating efficiently throughout the pool.

The pool should then be filled to the correct operating level, the filtration system started, and the water professionally balanced by adjusting the pH, alkalinity, calcium hardness, and sanitiser levels. Correct water chemistry from day one helps protect the pool surface and ensures crystal-clear, healthy swimming water.

At this point, your DIY fibreglass pool installation is structurally complete. All that remains is to finish your chosen landscaping, coping, paving, fencing, and any outdoor living features to create your ideal backyard.

With your equipment commissioned and water balanced, you’re ready to enjoy your new fibreglass pool with the confidence of knowing it has been installed to professional standards.

Pool fence safety requirements

Pool fence safety requirements

Before your pool can be used, a permanent pool safety barrier must be installed in accordance with the relevant Australian Standards and local building regulations. Pool fencing is a legal requirement and is essential for preventing unauthorised access while ensuring the safety of young children.

Your pool fence must comply with specific requirements, including:

  • Minimum fence height.
  • Maximum gap sizes beneath and between fence components.
  • Self-closing and self-latching gates that open away from the pool area.
  • Non-climbable zones free from objects that could provide access to the pool.
  • Correct positioning in relation to your home, boundary fences, and surrounding structures.

At Leisurescape Pools & Spas, we can supply and professionally install a wide range of compliant pool fencing solutions to complete your DIY pool project. Our experienced team installs frameless glass, semi-frameless glass, aluminium tubular fencing, and custom fencing solutions, ensuring your pool barrier is both safe and visually complements your outdoor space.

Once the fencing has been installed, your pool will require a final compliance inspection by an approved pool inspector or building surveyor. After passing the inspection, you’ll receive the required compliance certificate, allowing your pool to be registered with your local council where applicable.

Whether you choose to install the fencing yourself or have our team complete the installation, we’re here to help ensure your pool meets all compliance requirements and is ready for years of safe enjoyment.

Pool compliance inspection and certification

Pool compliance inspection and certification

Once your permanent pool fencing has been installed, the final step is to arrange a pool compliance inspection. An approved pool inspector, building surveyor, or your private certifier will inspect the pool and safety barrier to ensure the installation complies with the relevant Australian Standards and local building regulations.

During the inspection, the assessor will check that:

  • The pool safety barrier meets all compliance requirements.
  • Gates are self-closing, self-latching, and operate correctly.
  • Non-climbable zones are maintained.
  • The pool has been installed in accordance with the approved plans and permit requirements.

If the inspection is successful, you will be issued with a Certificate of Barrier Compliance (Form 23). This certificate can then be submitted to your local council to register your pool and complete the approval process.

The good news is that your landscaping does not need to be finished before the compliance inspection. As long as the pool and safety barrier meet all regulatory requirements, you can obtain your compliance certificate and complete paving, decking, gardens, turf, and other landscaping works at your own pace.

If you need assistance after your DIY pool installation, Leisurescape Pools & Spas can also help complete the finishing touches. Our experienced team offers professional installation of pool fencing, paving, decking, coping, retaining walls, synthetic turf, and landscaping, allowing you to transform your new pool into a beautifully finished outdoor living space.

Pool maintenance and ongoing care

Pool maintenance and ongoing care

Once your fibreglass pool installation is complete, regular maintenance and correct water management are essential to keep your pool looking its best and protect your investment for years to come.

Maintaining the correct water chemistry balance is one of the most important aspects of pool ownership. Balanced water helps protect your fibreglass pool surface, filtration equipment, pumps, and sanitising system, while ensuring your pool remains clean, clear, and safe for swimming.

Regular water testing

To maintain the health of your pool, water should be tested regularly and adjusted as required. We recommend customers complete a monthly water test to monitor water balance and identify any issues before they become problems.

At Leisurescape Pools & Spas, we offer complimentary in-store water testing to help you maintain your pool correctly. Simply bring a water sample into our showroom, and our team can test your water and provide advice on any adjustments required to keep your pool operating at its best.

Regular testing should monitor and balance:

  • pH levels – to help prevent damage to the pool surface, equipment, and ensure sanitiser works effectively.
  • Sanitiser levels – to maintain clean, healthy swimming water.
  • Total alkalinity and calcium hardness – to support stable water chemistry and prevent issues such as scaling or corrosion.
  • Salt and mineral levels – for salt and mineral chlorination systems to ensure correct operation.

Correct water balance is also a requirement of your pool shell and equipment warranties, making regular testing and maintenance an important part of protecting your investment.

If you need advice after installation, the team at Leisurescape Pools & Spas is available to provide ongoing support and guidance.

Important pool care tips

There are several important rules to remember when caring for your fibreglass pool:

  • Never empty your pool without contacting Leisurescape Pools & Spas first. Removing water from a fibreglass pool can create hydrostatic pressure issues, particularly if groundwater is present, and may result in movement or damage to the pool shell.
  • Understand the purpose of your hydrostatic valve and standpipe. The standpipe allows groundwater levels beneath your pool to be monitored and managed. It is important that the standpipe remains accessible, protected, and free from obstructions so it can function correctly when required.
  • Monitor drainage around your pool area. Ensure stormwater, garden irrigation, and surface water are directed away from the pool surrounds to reduce the risk of groundwater pressure, erosion, or damage.
  • Keep equipment accessible. Your pump, filter, chlorinator, heat pump, and other pool equipment should remain easy to access for regular servicing, maintenance, and warranty support.
  • Follow manufacturer guidelines. Maintaining your equipment according to the supplier’s recommendations will help maximise performance, efficiency, and warranty protection.

With regular care, correct water balance, and proper maintenance practices, your fibreglass pool will continue to provide a safe, beautiful, and enjoyable outdoor space for your family for many years to come.